Connect to the internet ("WAN")
Kisi Controllers, Kisi Readers, and Kisi Terminal Pro
If you want to connect your Kisi devices to the internet over Wi-Fi, you'll need to run a BlinkUp on them. With BlinkUp, you transmit your wired or wireless network credentials to the Kisi Controller and readers.
Prerequisites
- Physical access to the Kisi device
- A mobile phone
- The Kisi iOS or Android app installed on the mobile phone
Kisi devices are pre-configured at the factory to exclusively use Ethernet. If Ethernet is the only connectivity option you wish to use, you do not need to perform a BlinkUp. BlinkUps are only required if you need to configure Wi-Fi credentials, no longer wish to use Wi-Fi, or have previously cleared the settings.
What is BlinkUp?
Electric Imp's BlinkUp™ technology allows you to transmit wired or wireless network credentials to Kisi Controller and Readers via a series of light flashes to a photo-optical sensor on the Kisi device.
BlinkUp use cases
There are three use cases for running a BlinkUp:
- Connect over Wi-Fi & Ethernet: if your device does not have Ethernet, this will only set up Wi-Fi. Ethernet, if available, will be the preferred connection for your device.
- Connect over Ethernet only: if you've been using Ethernet out-of-the-box, but configured Wi-Fi in between, you have to blink-up your devices to go back to Ethernet.
- Clear configuration: reset your Kisi device's internet connection settings. If you are having trouble connecting your Kisi device to the internet, try clearing these settings first.
Clear configuration
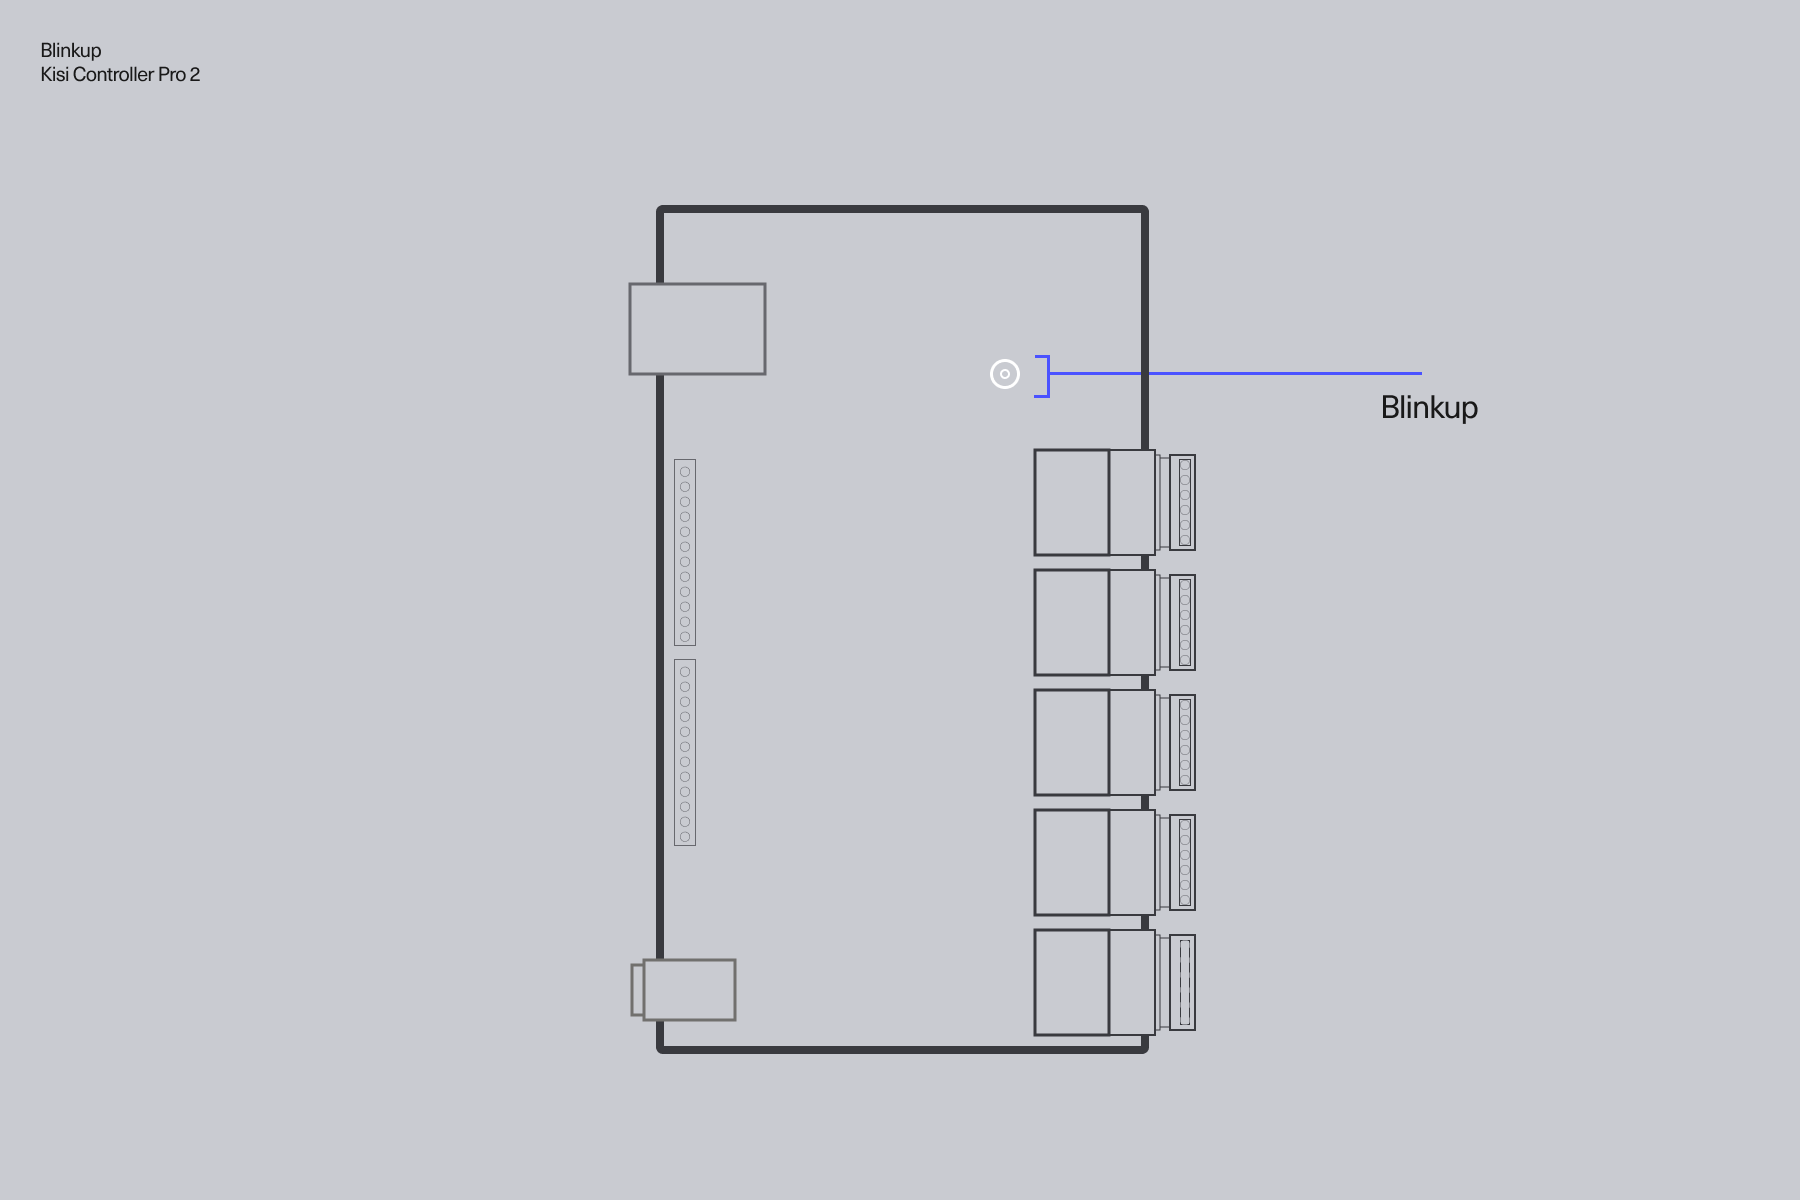
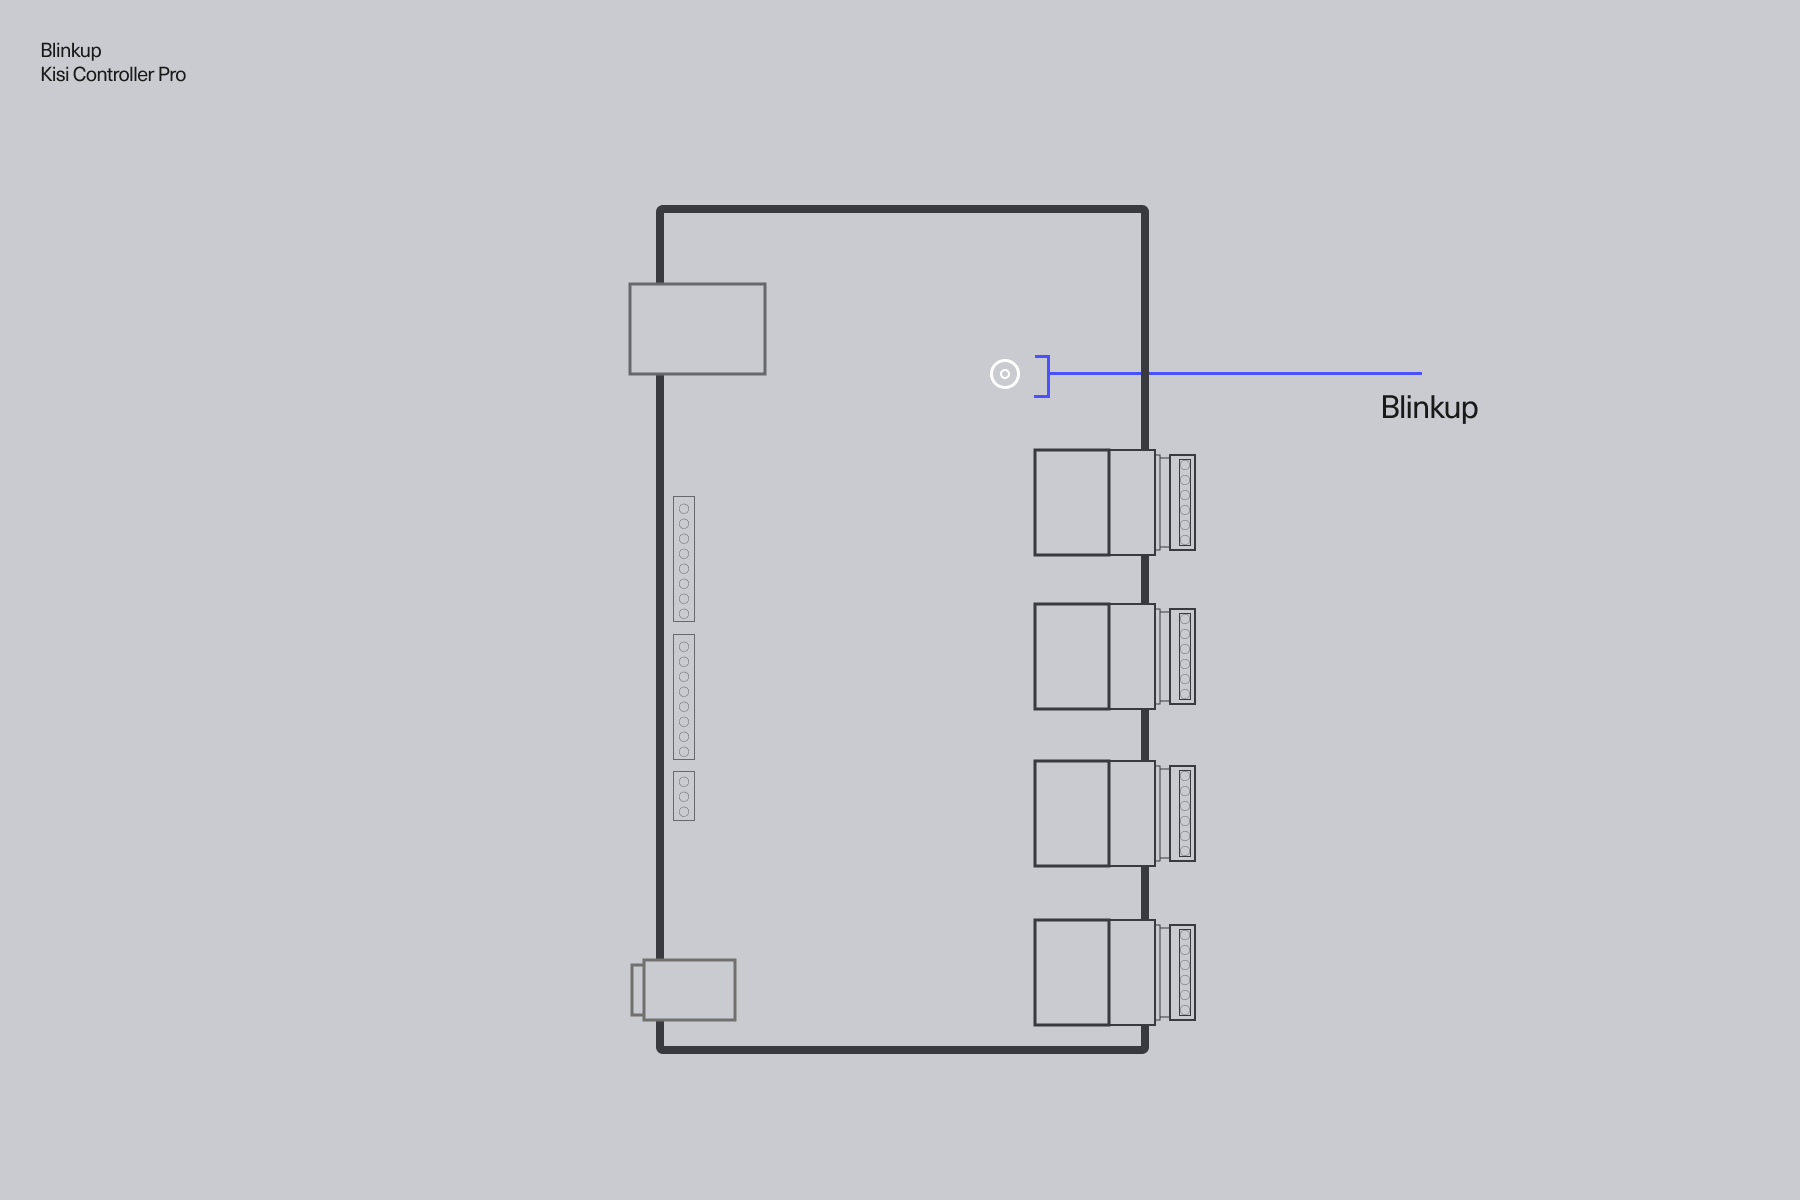
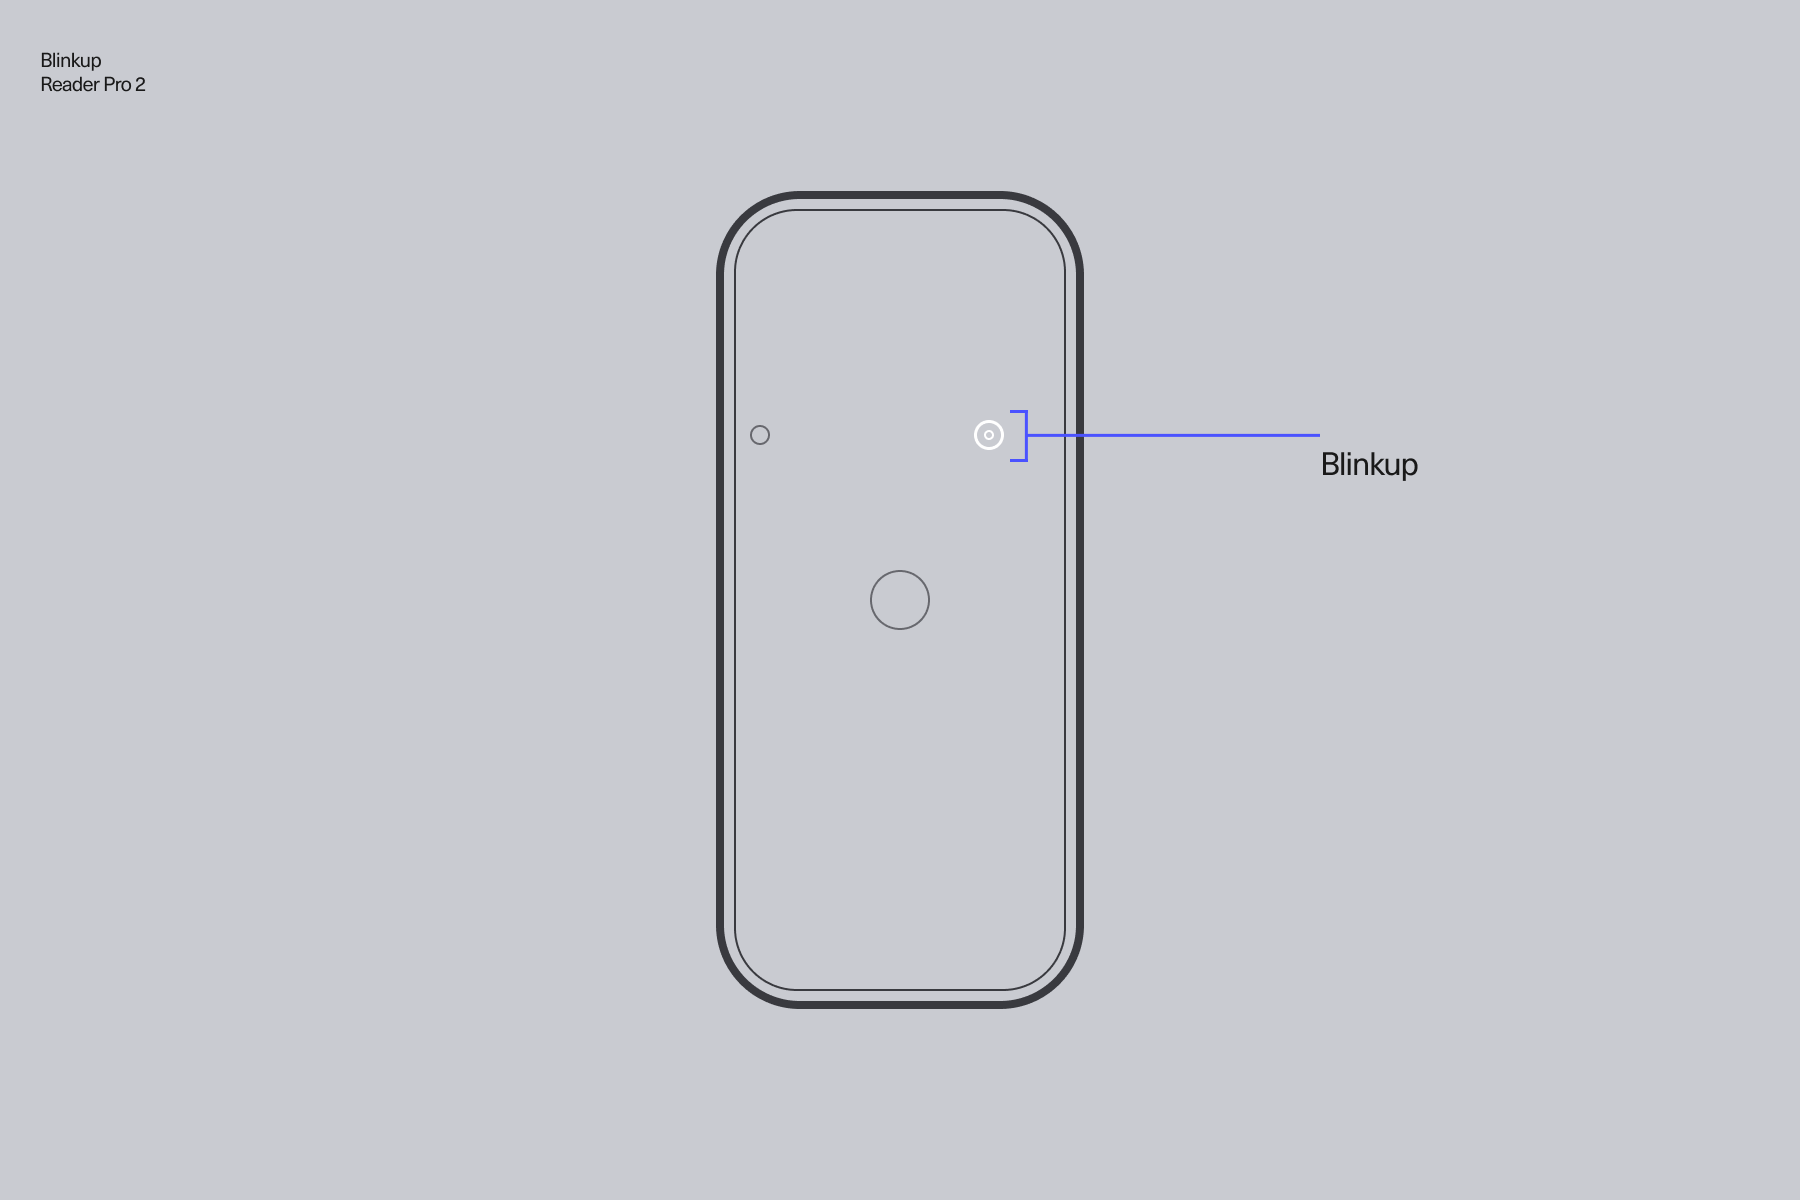
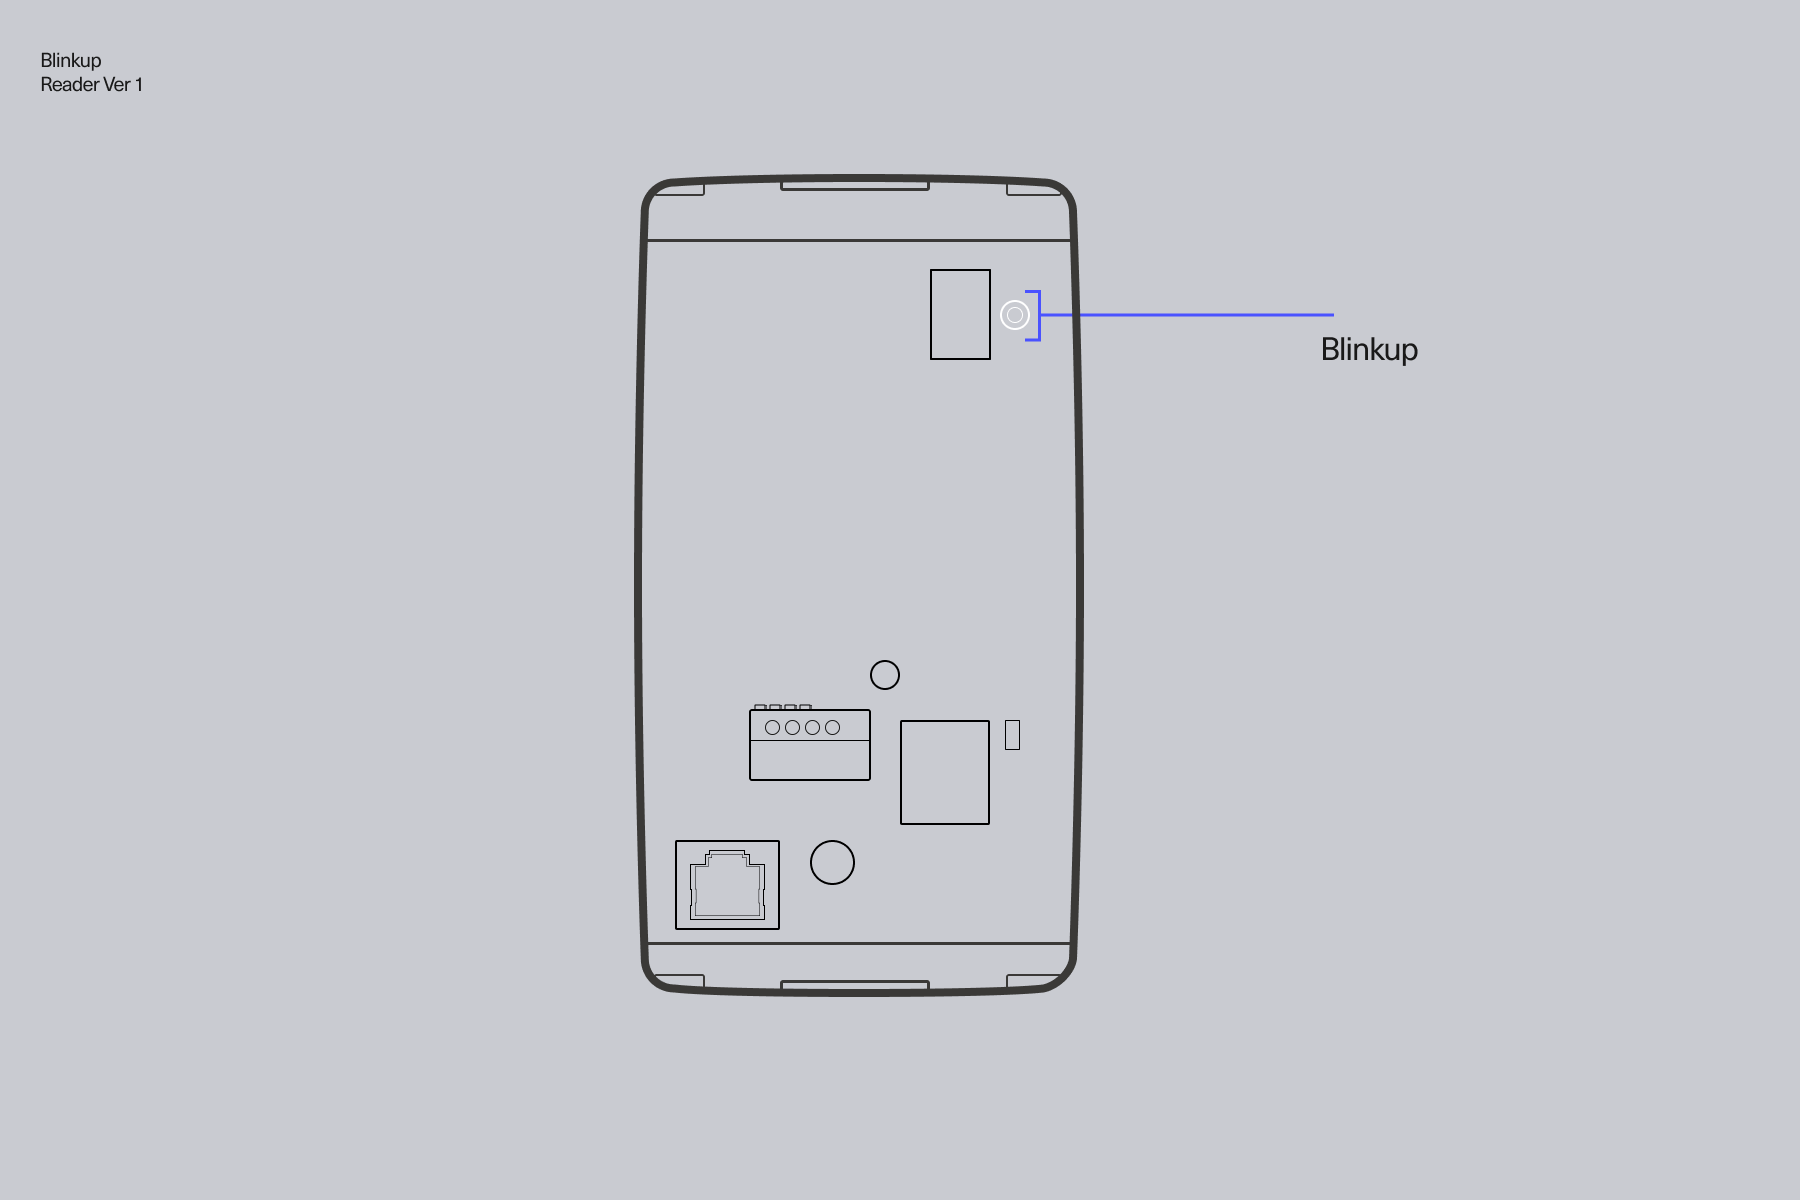
It is advisable to reset your Kisi device's internet connection settings before performing the BlinkUp process. Use the tabs below to accurately pinpoint the location of the BlinkUp sensor LED on the back of your controller and/or reader. Once you have located the LED, follow the instructions provided below the images.
- Kisi Controller Pro 2
- Kisi Controller Pro 1
- Kisi Reader Pro 2.0
- Kisi Reader Pro 1.0
Verify your Kisi Controller Pro 2 version number
-
Kisi Controller Pro 2 devices with revision numbers under 553xxxxxx support both Ethernet and Wi-Fi. For higher revision numbers, only Ethernet is available. You can verify your revision number under Controller details.
-
If Wi-Fi is your only option, we recommend using a wireless bridge device for seamless connectivity.
Note that the BlinkUp status and sensor LED is located on the upper-right area of the control panel. When initiating the BlinkUp process, make sure to locate the LED on the back of your device and point your phone towards the sensor for successful setup.

Note that the BlinkUp status and sensor LED is located on the upper-right area of the control panel. When initiating the BlinkUp process, make sure to locate the LED on the back of your device and point your phone towards the sensor for successful setup.

Note that the BlinkUp status and sensor LED is located on the back of your reader. When initiating the BlinkUp process, make sure to locate the LED on the back of your device and point your phone towards the sensor for successful setup.

Note that the BlinkUp status and sensor LED is located on the back of your reader. When initiating the BlinkUp process, make sure to locate the LED on the back of your device and point your phone towards the sensor for successful setup.

- Confirm that the status and sensor LED in the Kisi device is blinking. If it is not, restart the device.
- Sign in to Kisi on mobile
- Tap on the home icon to open the Admin Dashboard
- Tap on Connect Kisi Devices
- Tap on OK, Let's Get Started
- Tap on Clear connections
- Tap on Start BlinkUp now and hold your phone's screen to the device
After completing the BlinkUp process, check your Kisi mobile app for status confirmation. A successful configuration clearing will be indicated by the status and sensor LED on the Kisi device blinking in orange. If not, please redo the process. For additional details, refer to the BlinkUp codes.
Blink-up your Kisi devices from mobile
After clearing the configuration, you can initiate the BlinkUp process for the device. You have two options to choose from:
- Connecting to the internet via Wi-Fi and Ethernet
- Connecting only via Ethernet
- Android
- iOS
-
Confirm that the status and sensor LED in the Kisi device is blinking. If it is not, restart the device.
-
Sign in to Kisi on mobile, and click on a place
-
Click on the home icon and select Admin Dashboard
-
Click on Connect Kisi Devices
-
Click OK, Let's Get Started
-
Select your use case (Connect over Wi-Fi and Ethernet, Connect over Ethernet only).
- Note: If you select the Connect over Wi-Fi and Ethernet use case, you will be prompted to select the Wi-Fi network and enter the password. You can also connect your devices to Wi-Fi using WPS.
-
Click on Start BlinkUp Now and you will see a 3 seconds countdown
-
Hold your phone screen to the BlinkUp sensor in the Kisi device to begin the process
-
Your phone screen will rapidly flash between maximum and minimum brightness at a fixed rate. Once it ends, your phone will vibrate.
-
Confirm that the status and sensor LED in the Kisi device is blinking. If it is not, restart the device.
-
Sign in to Kisi on mobile, and click on Settings
-
Click on Admin Dashboard
-
Select Connect Kisi Devices
-
Click OK, Let's Get Started
-
Select your use case (Connect over Wi-Fi and Ethernet, Connect over Ethernet only, or Clear device connection).
- Note: If you select the Connect over Wi-Fi and Ethernet use case, you will be prompted to select the Wi-Fi network and enter the password. You can also connect your devices to Wi-Fi using WPS.
-
Click on Start BlinkUp Now and you will see a 3 seconds countdown
-
Hold your phone screen to the BlinkUp sensor in the Kisi device to begin the process
-
Your phone screen will rapidly flash between maximum and minimum brightness at a fixed rate. Once it ends, your phone will vibrate.
During BlinkUp, your phone screen will rapidly flash. Make sure you always blink-up with the screen facing away from you and directly towards the BlinkUp sensor on the device being configured, especially if you suffer from a medical condition that makes you susceptible to strobing light.
Once the BlinkUp is completed, check your Kisi mobile app for status confirmation. For a successful BlinkUp, the status and sensor LED on the reader has to shine in a solid green for three seconds right after the BlinkUp sequence ends. Otherwise, please repeat the process.
BlinkUp codes
In this section, you'll find the BlinkUp codes. These codes help you identify the root cause of a failure by analyzing the pattern that flashes just before the LED powers down. A solid red or rapidly flashing red LED indicates a power supply issue.
The abbreviation "ms" refers to milliseconds, which is one thousandth of a second (0.001 seconds). This unit of time is commonly used to specify the duration of electronic signals and responses in hardware configurations.
Pre-BlinkUp and BlinkUp Patterns | ||||||||||||||
|---|---|---|---|---|---|---|---|---|---|---|---|---|---|---|
No network settings or enrollment credentials | 500ms | 500ms | Repeat | |||||||||||
imp005 waiting for Ethernet | 500ms | 500ms | 250ms | 250ms | Repeat | |||||||||
BlinkUp Successful | For three seconds | |||||||||||||
Wi-Fi-only Connection Patterns | ||||||||||||||
WPS in progress (press WPS button on router) | 500ms | 250ms | 250ms | 250ms | Repeat | |||||||||
Searching for Wi-Fi network | 500ms | 500ms | 500ms | 250ms | 250ms | 250ms | Repeat | |||||||
Joining Wi-Fi network | 500ms | 500ms | 500ms | 250ms | 250ms | 250ms | 250ms | 250ms | Repeat | |||||
Wi-Fi and Ethernet Connection Patterns | ||||||||||||||
Getting IP address | 500ms | 250ms | 250ms | Repeat | ||||||||||
Resolving server name | 500ms | 250ms | 250ms | Repeat | ||||||||||
Connecting to server | 500ms | 500ms | 500ms | 250ms | Repeat | |||||||||
Connected to server | 500ms | 500ms | Repeat | |||||||||||
Proxy address or port incorrect | 500ms | 500ms | 250ms | 250ms | 250ms | 250ms | Repeat | |||||||
Proxy credentials rejected | 500ms | 500ms | 250ms | 250ms | 250ms | 250ms | 250ms | Repeat | ||||||
Kisi Intercom Pro
Please attach an Ethernet cable to the Kisi Intercom Pro. It will connect to the internet automatically.